Happy weekend, everyone! 🍹 This week, we've released 17 updates including two great new features, the biggest of which is that you can now add a blog to your OwnerRez website! Let's go through it.
New Features
Those of you with an OwnerRez website, sit up in your chairs and pay attention - you're not gonna want to miss this.
For a while now, we've been asked "how do I publish news or blog posts on my website" without providing a good answer. Previously, we recommended adding custom pages that were crafted to look like blog posts or using a subdomain (ie. blog.mysite.com) that pointed to a different platform like WordPress. Let's face it - those options stink! Using a separate platform like WordPress means your users have to leave your main website, and you gain no SEO juice from the content you create.
Imagine if it were this simple to add a blog to an OwnerRez website...
Yep, it is now that simple!
We've added a full blogging platform directly into OwnerRez websites, and you can now turn it on and begin writing blog posts within a few minutes. It handles all of the normal things a good blog platform should do out of the box:
- Blog index page - shows the running stream of latest posts paging backward over time
- Blog post page - the actual post or article that you write
- Categories - you can tag different posts by different categories (eg. announcements, promotions, events in your area, other series)
- Subscription options - a standard RSS feed that any feed reader will recognize is built, social media links are shown
- Sidebar options - show your categories, latest posts, subscription links
- Custom images - teaser images, post mastheads and category images are all built in
- Mobile friendly - all pages work seamlessly on mobile, tablet and desktop including the menu structure
- Native URLs - instead of using a subdomain, you'll get a "/blog" URL right under your website that will give search engines more pages to search on your domain name
- SEO optimized - the menus and page structures are designed to increase the keywords of your website content
To get started, go to your OwnerRez website under Settings and drill in.
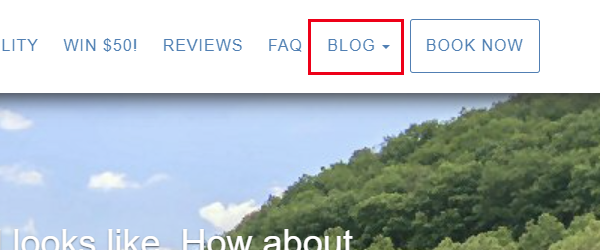
To make a blog show up on your website, all you have to do is create a new page for it using the same page selector you use for properties, maps, availability, reviews and everything else. Click "Create Page" and you'll see a new page option for "Blog" showing.
After creating the blog page, you'll see that page show up in your list of Menus & Pages, the re-ordering layout screen and everywhere else your pages show up when configuring your website.
You'll also notice the menu show up on the live website. Go ahead and run over there and check it out!
One click and you already have a blog showing!
But notice that the blog is empty. To be clear, everything we did above was just to add a menu for where the blog will show up on your website - basically just a placeholder. Now you need to write some actual content and flesh it out!
Back in the website settings, you'll notice a new "Blog" tab showing next to Menus & Pages. This tab shows all the time, even if you didn't do the above steps to add a blog menu. Click that Blog tab, and you'll see a new section where you can add blog content and settings.
The buttons there should be pretty intuitive, but let's run through a couple anyway...
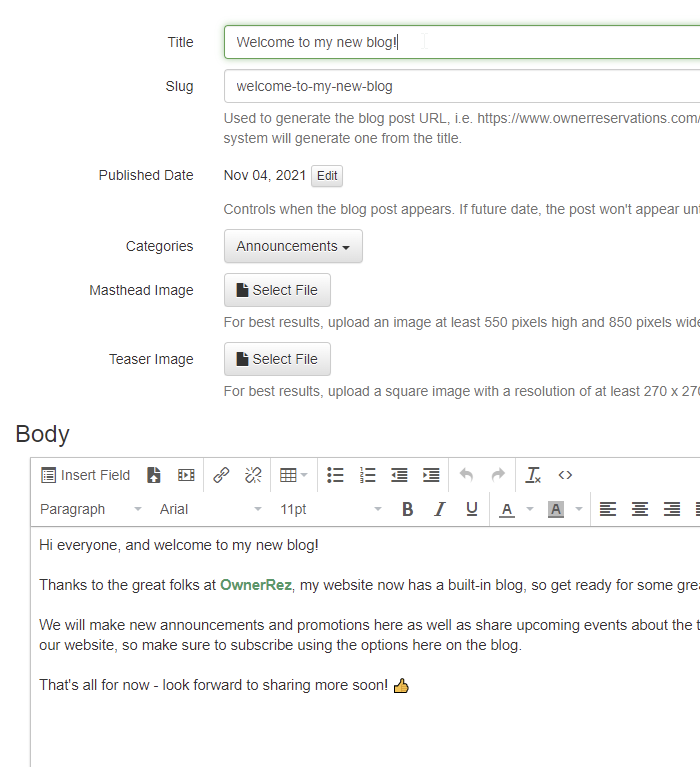
The "Write Post" button will help you create new blog posts. Each post has fields for the post title, slug (URL you want to use), published date, body and teaser intro. You can also set a category, teaser image and masthead image.
The only fields that are required to create a blog post are the title and body. Everything else is optional. If you don't provide images, we'll use placeholders by default so that the blog post still looks good.
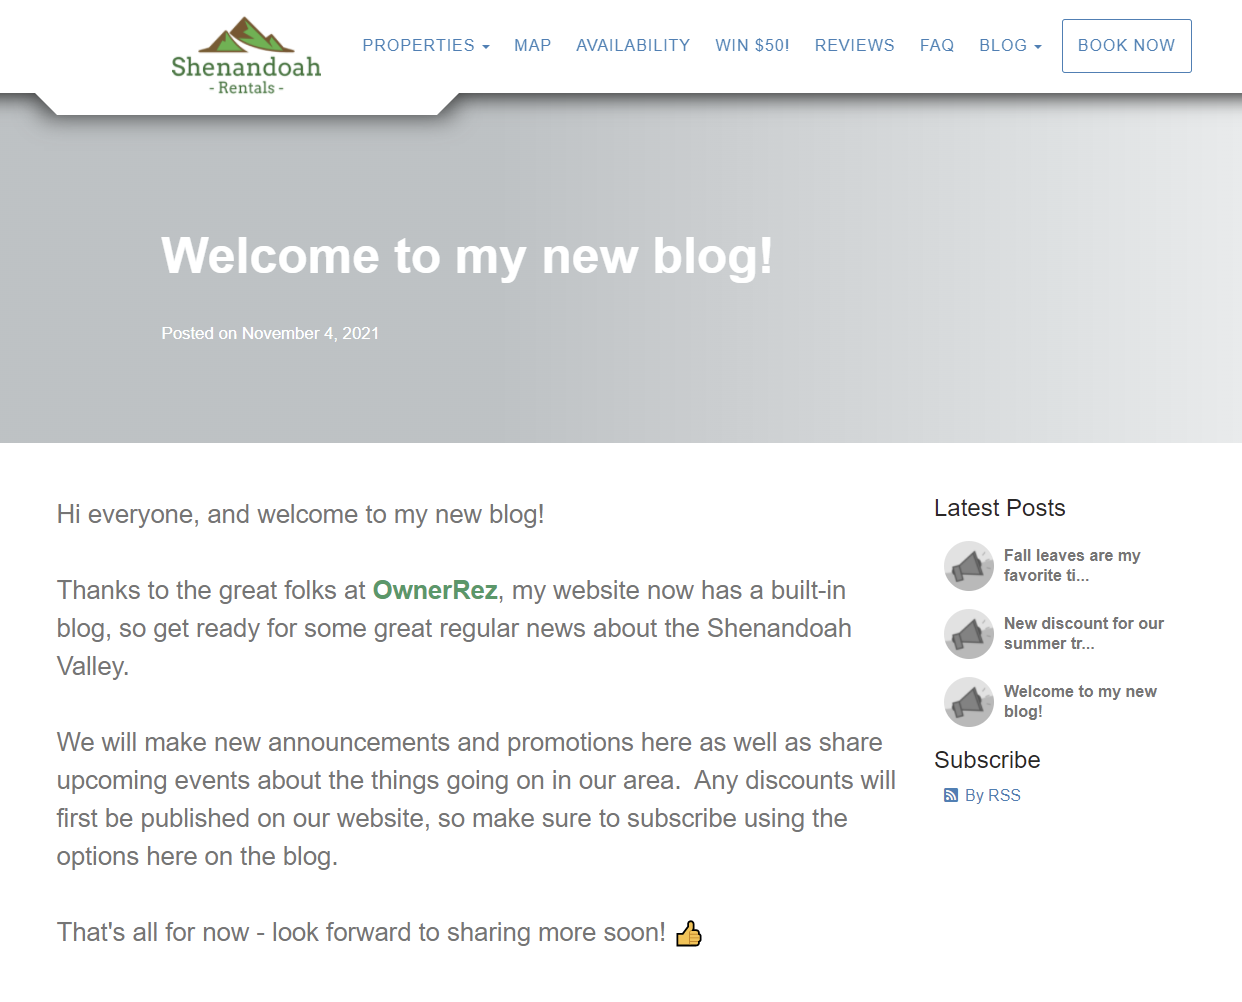
After saving the blog post, go check out your website. Voila, there it is!
If you don't provide a Published Date, the post won't show live on the blog. This is a good way of working on a post early, before the day you want to publish it, and then making it go live later. You can also set a future Published Date which will make it automatically appear on that day in the future. For instance, you might want to post something on the upcoming weekend, but you want to finish it now while you have more time. You can do that by creating the post now and setting the Published Date to the upcoming weekend. Once that day arrives, the blog will begin showing the post. The "Subscribe By RSS" link does the same thing - it only shows the posts that are published.
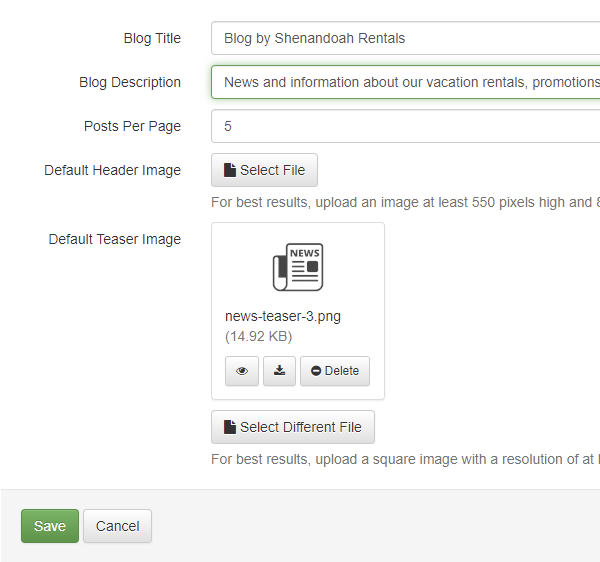
Another button you'll see is "Blog Settings" which will take you to a simple page where you can configure a couple of high-level things about your blog. Do you want the index page to show more than 5 posts at a time? You can set that here. Want a default image that is different than the placeholder we use? You can set that here as well.
After changing the default teaser image, notice how the blog looks when we go back and refresh the index page.
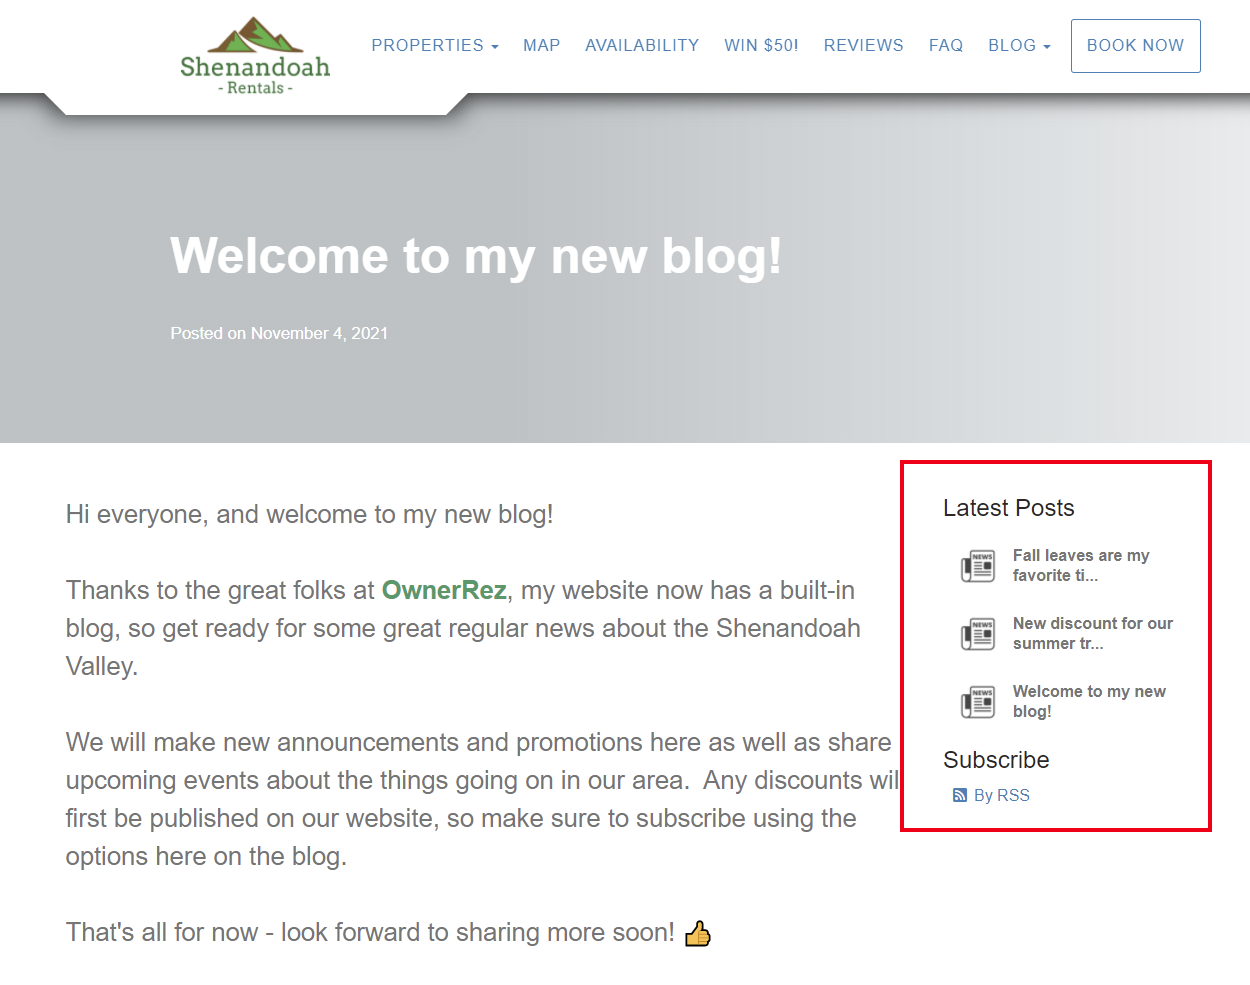
The little "news" image that I set as the Default Teaser Image in the Blog Settings area is now the default that shows for all blog posts, both next to each post in the index but also in the sidebar.
And the sidebar is the same both on the index page and individual blog post pages:
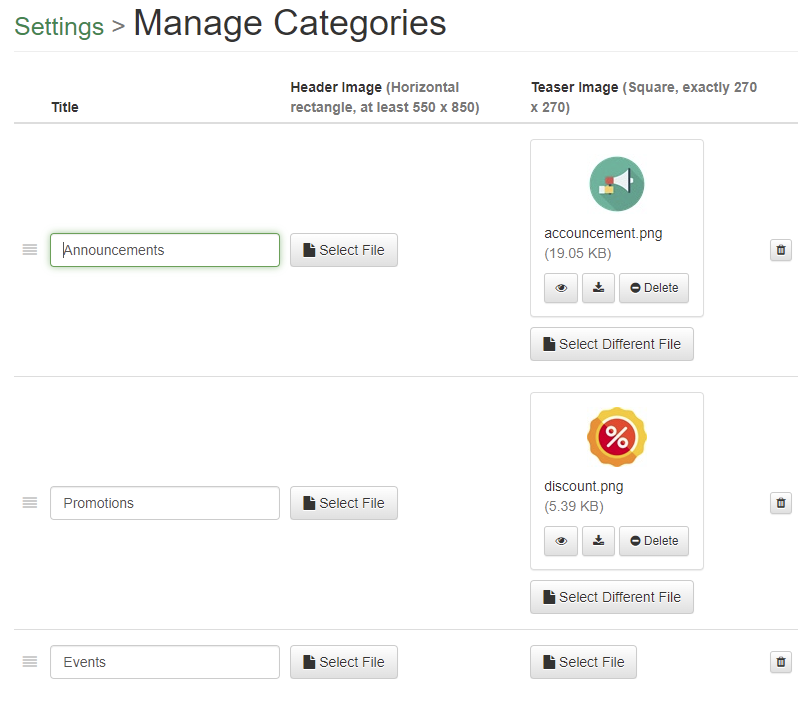
The last blog area we'll talk about is "categories". Back in the Blog tab, notice on the far right the "Create Categories" button. Click that button, and you'll see a list you can fill out with whatever categories you want. Categories are basically just tags or labels that you can apply to blog posts that are similar. For instance, you might have categories for "Promotions" where you talk about discount codes you are giving out or promotions by other vendors in your area. You might have an "Events" category where you talk about your annual schedule, parties, conferences, get-together, local or regional events and so on. You can create any kind of category you want - it's completely up to you how you want to categorize your posts.
Create a couple of categories, then click save.
Back on your blog posts, notice that your new categories show up for selection. Select the category that applies to the blog post and save.
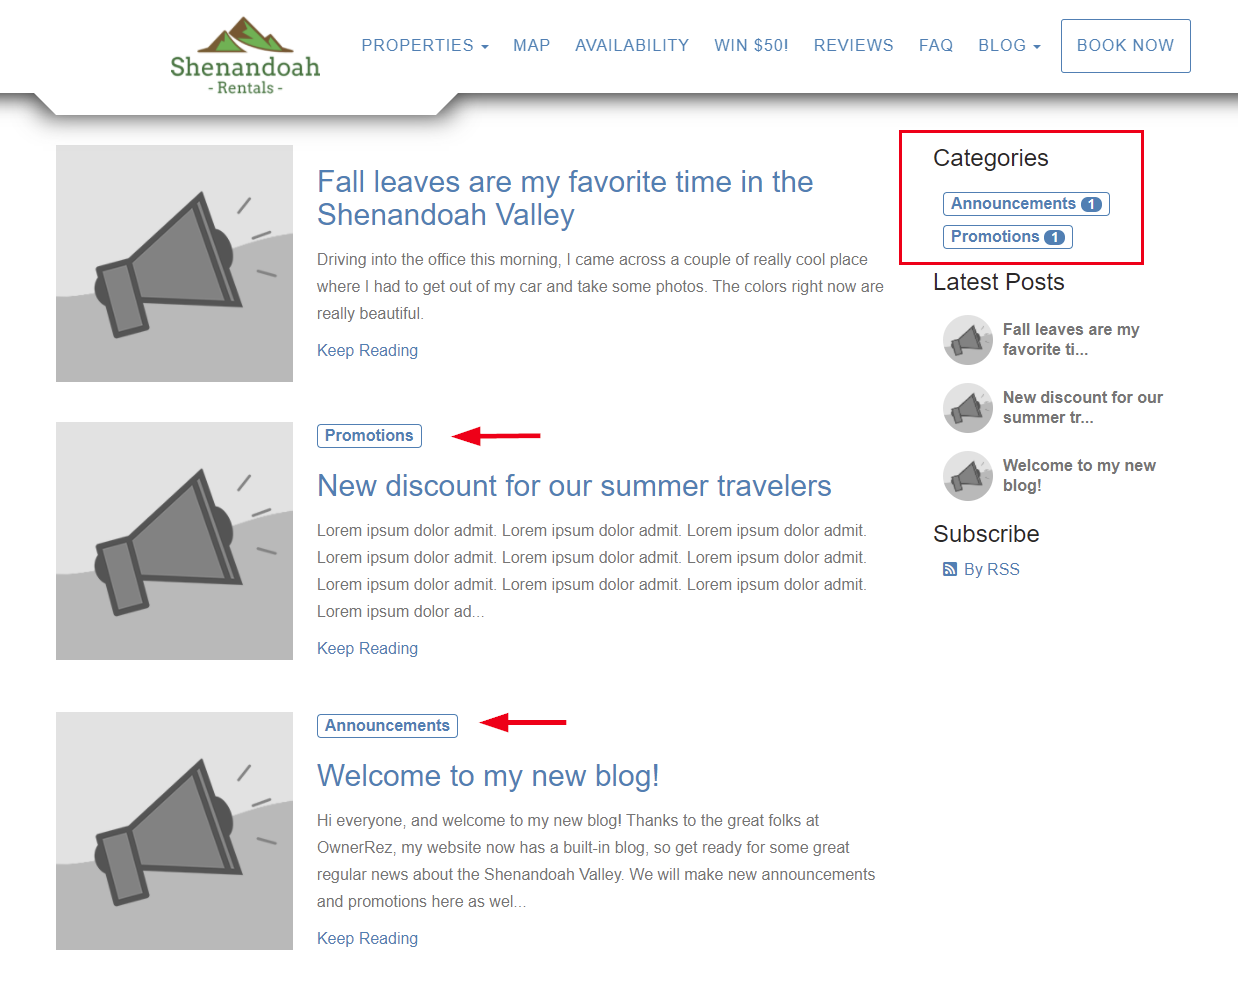
If you refresh your website, notice how and where the categories show up.
The sidebar will show a categories section, along with a number count for how many posts there are in each category, and allow you to click on each one to find just those posts. Each post will also show a label for the category.
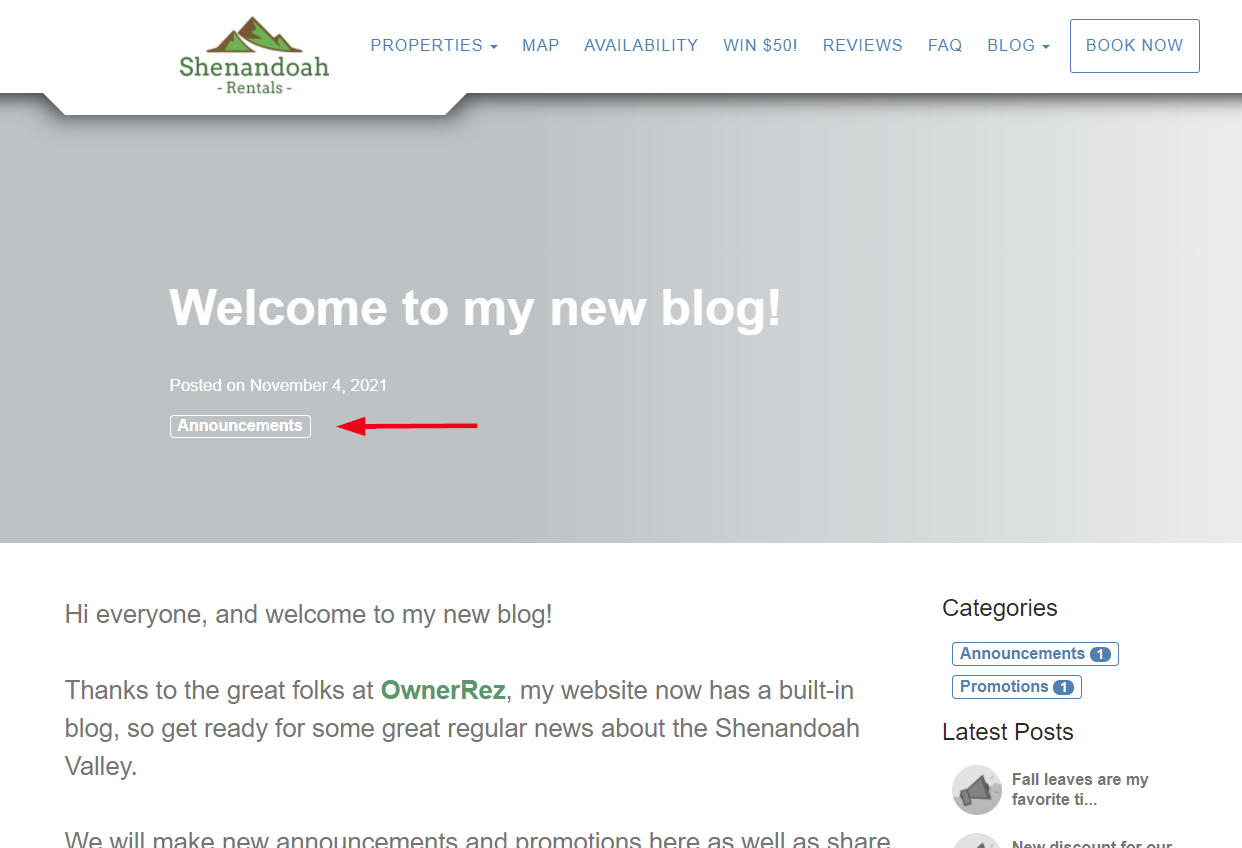
The post page, itself, also shows a label for the categories that are assigned. There can be multiple categories assigned to the same post.
Categories can also have default images configured so that all posts of that category have a certain teaser or mastheads image showing instead of the site-wide defaults.
After adding a couple of images to the categories page, notice how the blog index, post and sidebar areas change.
The above teaser images changed without updating anything on the blog posts themselves. Because two of the blog posts were assigned to categories, and those two categories have teaser images, the blog posts automatically use the same images.
Keep in mind that each blog post can have its own individual teaser and masthead image, overriding the category, so each post can be unique regardless of the assigned category.
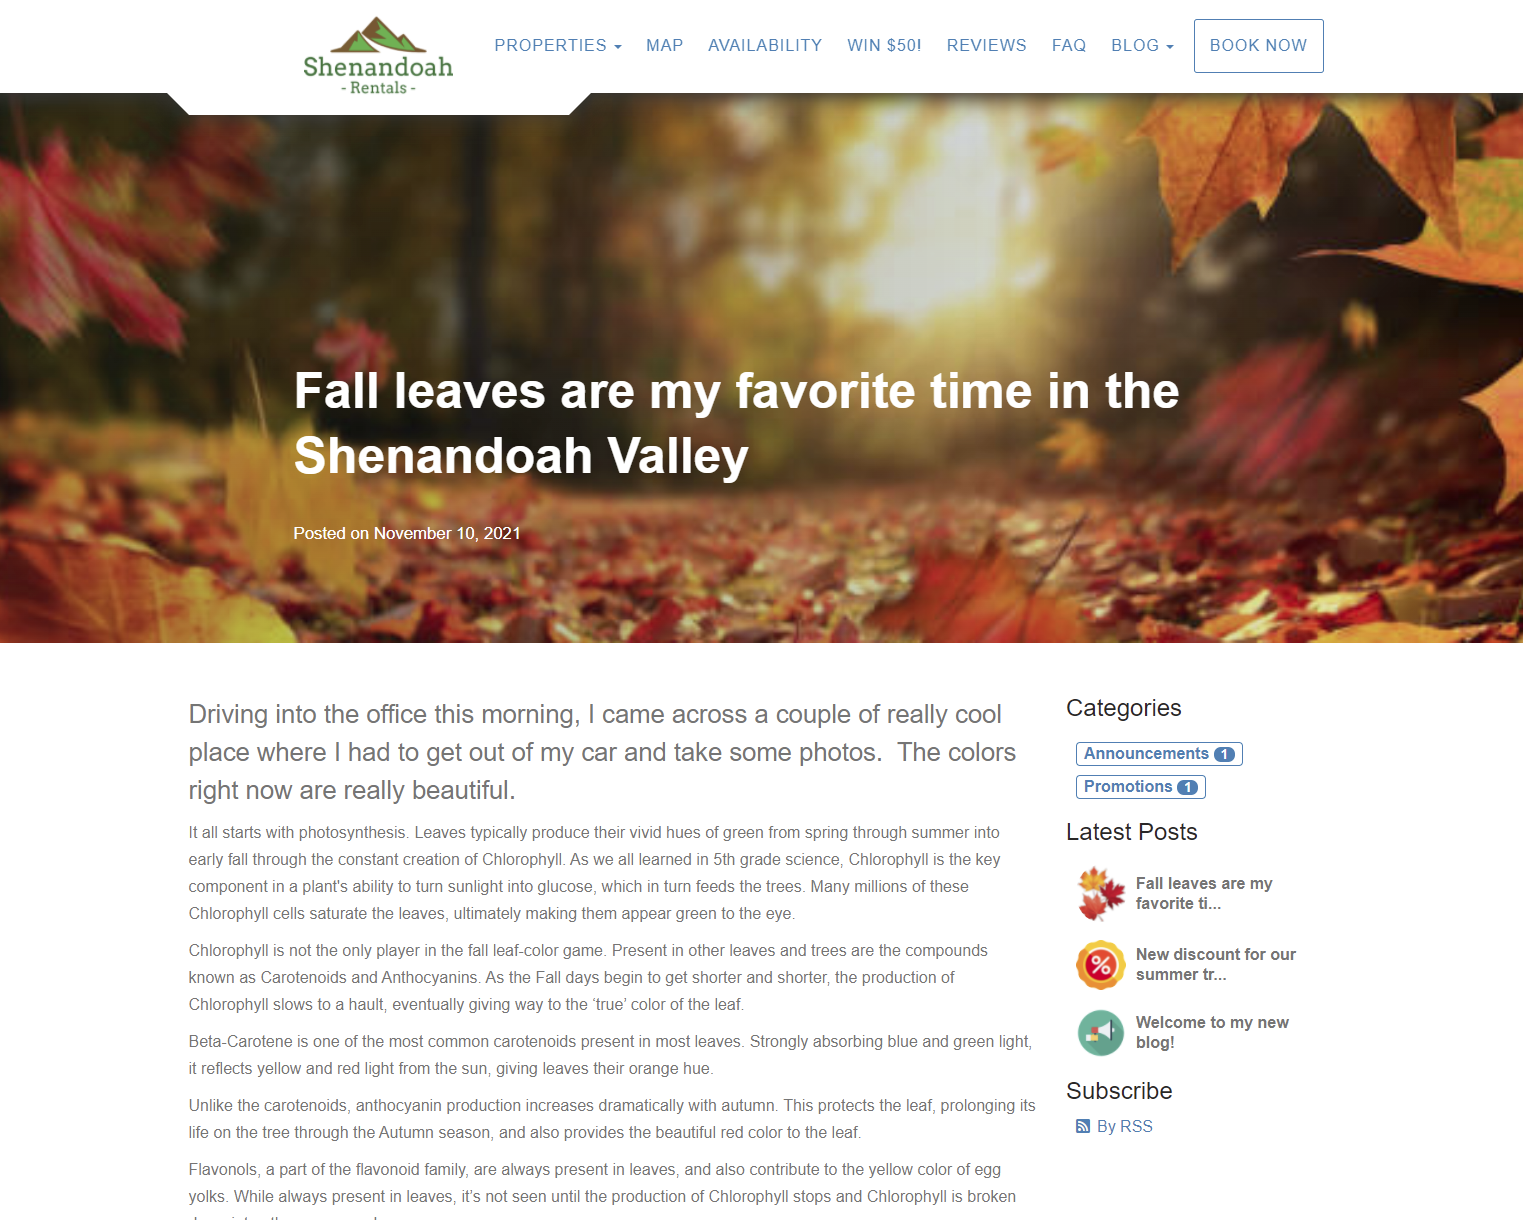
For the latest blog post about "Fall leaves are my favorite..." I want to give that some unique images, so I'm going to set a teaser and masthead image that looks like leaves on that blog post specifically. Here's a quick landscape (ie. horizontal) image I found on Google for "leaves", and I set it to be the masthead image:
And here's a little square leaves image I set for the teaser image on the main page:
There are other things to point out about the new blog feature, but this should be enough to get you started! Enjoy, and as always, send us questions (or comment below) about what you like or dislike.
One last pro-tip on blogs... If you decide to temporarily hide your blog, you don't need to delete or un-publish all of the posts. Just disable the Blog menu in the Menus & Pages list and the entire blog will disappear. All of your posts and content will still be in the system, under the covers, but the menu won't show on the website.
As awesome as the new blog is, there's another new feature that I am excited to talk about! You can now associate your property photos with rooms and amenities, and that will sync across to Airbnb as well.
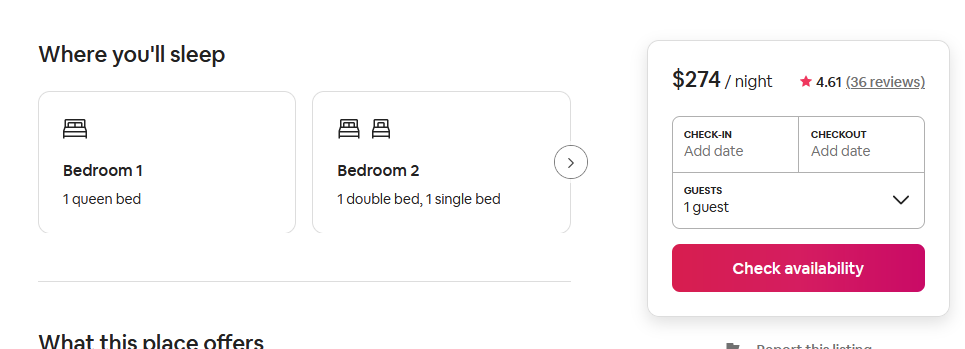
Some of you have noticed that Airbnb now shows all rooms for a listing, not just bathrooms and bedrooms. To demonstrate my point, this is what Airbnb listings used to show for bedrooms and bathrooms on live listings:
There was a little set of tiles for each bedroom with the beds that each bedroom contained.
Now, Airbnb lets users define all the rooms of the property, like kitchens and dining rooms, instead of just bedrooms, and you can put beds in those other rooms as well.
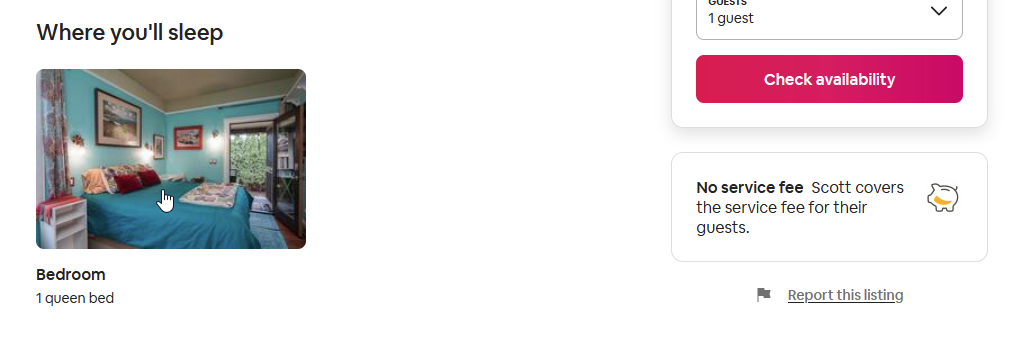
If you recall, we released an update of our own a few weeks ago to add "other Rooms" to OwnerRez so that you could do the same thing in our system. This update adds to that by associating photos with those other rooms that you create and pushes the photo and room combinations to Airbnb. If you do that, you get photo tiles on Airbnb instead of the little cartoon drawings (shown above). Here's an example of an OwnerRez user's listing on Airbnb after the photo and rooms were tied together:
When you click on that bedroom photo, you get a screen that shows all the photos of the house broken down by room. It looks like this:
Airbnb has some improvements to make with how they show the default room tiles on the main page, but it's super cool that this is now possible. Your guests can now see exactly what each room looks like by clicking on rooms instead of panning through dozens of images and having to figure it out on their own.
To make this work in OwnerRez, go to any property and click the Photos tab to see the photos that you uploaded for that property. You'll notice a new button next to the caption that looks like a tag image.
Click that button to open a window with more details about the photo. You'll see a large input box where you can change the caption, but under that is a Room drop-down where you can select the room that the photo goes with. In this case, I clicked on a photo of the dining room, so I am going to select "Dining Room" under Other Rooms in the drop-down.
Don't have a "Dining Room" option in your drop-down? That's because you never created that room! Go over to the Rooms tab and create rooms like kitchen, dining room, living room and then come back to the photos.
Please note that you need to flag all of your bedroom and bathroom photos to the correct bedroom or bathroom that they belong with, so take the time to do that as well. If you don't associate the bedroom and bathroom photos, the other rooms won't show. We're not sure why Airbnb chose to do it this way - it might be a temporary thing - but our testing shows that bedroom and bathrooms need to be associated or the other rooms won't show up.
It will take some time to run through and properly create rooms and associate photos with the correct rooms, but once you do it once, you're all set! And in the future, we're planning to add this to Hosted Websites and other channels that support it, so you won't have to do it again - it will just work.
Enhancements & Tweaks
Remember the design cleanup work we talked about in the past few weeks? We were back at it again this past week updating the design of the booking area. All pages under the booking area (the booking "tabs" or menus) are now newly updated to reflect our latest design and are mobile-friendly. This includes pages like the booking notes, travel insurance, damage protection, messages, scheduled email, pending and confirm-booking pages. It includes the cancellation page as well, but we'll discuss that in next week's update as part of that is still being tested and worked on. All of these pages now reflect a mobile-friendly modern design.
Notice that, like with the quotes pages, the "Notes" tab has been moved to the overview page of the booking for fast immediate access.
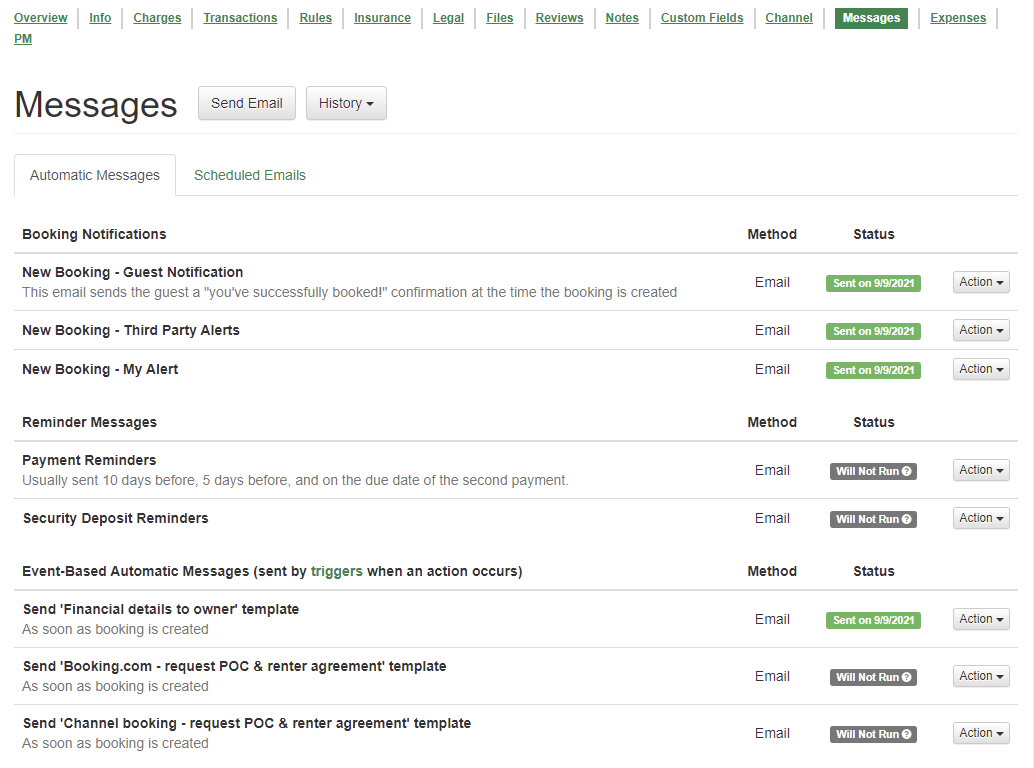
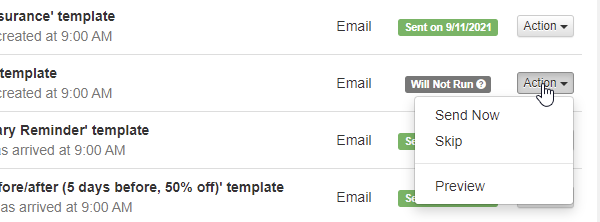
Notice the Messages tab as well. It now looks more like our system message and system alerts pages with a Status column and the action buttons on the side under an Actions drop-down.
To see more information about the status, hover over the status and some pop-up text will show.
To skip, un-skip, preview or send now, click the Actions button on the far right.
If you missed the blog post earlier this week, note that our SMS pricing is changing. We tweaked our billing and invoicing engine for the new pricing changes and began showing "segment" pricing on invoices. The new pricing doesn't go into effect until January 1 for everyone, but our billing system has been updated now in anticipation of that change.
Remember how we recently made it so that your review count and star ratings show up on Google searches? We noticed a couple of issues to tweak. Those star ratings now say "reviews" instead of "votes" on Google. and the home page now shows a reviews count in addition to the property pages.
If you don't see your pages changing on Google yet, give it a week to update. Google's search index can take a few days to update.
If I was to show you a property listing that had "1.5 baths", what kind of bathrooms would you think the property had? One full bathroom and one half bathroom, right? But what if a property had one full bathroom and 2 half bathrooms? How do you represent that in a real estate listing - 1.5.5 baths? 1.2 baths? 2 baths (for 1 + 2 halves)? We noticed that our bathroom math was confusing where properties had more than one half bathroom. It was adding the halves together, coming up with a whole and making the property look like it had additional full bathrooms. We changed our bathroom math so that bathrooms are described as "full" and "half" everywhere they are displayed.
The amenities, summary areas and search pages have all been updated to use this same language.
Bug Fixes
Copy the listing site on copied quotes. Did you know you can copy quotes or bookings quickly? On every quote and booking, there is a Copy To button that lets you quickly duplicate it into a new quote or booking. However, we noticed that when quotes were copied to new quotes, the listing site on the original quote didn't carry across to the new quote ended up showing no listing site. We've fixed that so that copying quotes will retain the listing site on the new quote.
Stripe tokenized cards can't be reused for travel insurance. Did your guest ask you to add travel insurance, the only card on file is a tokenized card? If you encountered this, you probably hit an error when you tried to purchase the travel insurance for your guest. We don't show those tokenized cards anymore.
Bad security deposit settings prevent booking updates. We've done a lot of work on security deposits recently, and we noticed a bug where certain security deposit settings - settings that predated our recent updates - would cause bookings to crash when other things about the booking changed. Our validation code would check the entire booking, notice the bad security deposit rules and crash because of those security deposit settings even though the user wasn't working in that area. This is now fixed.
Tags, not custom fields. Both of our "Stays" reports now allow you to show columns for tags and custom fields, but we noticed a typo where the tag option was referencing "custom fields" in the help text. This is now fixed.
Hey bro, your { is sticking out. Did you happen to notice that little curly bracket showing up on the bottom of the SMS Numbers overview page? No? Well, someone did, and they reported it. It's kind of like when the mechanic fixes your car but leaves a wire hanging out. The wire is safely tucked back into place now.
Crash when disabling SMS. We noticed a bug where disabling the SMS premium feature (under billing) would show a crash message. Did we do this purpose to stop people from disabling SMS? Of course not. 🤷♂️ All fixed now.
Crash when deleting SMS number. Evidently, trying to leave SMS is pretty difficult around here... If you tried to delete the phone number in your SMS settings, we would show a crash message. All fixed now.
Ghost SMS menu? Yes, that's right - another SMS-related bug. We noticed that the SMS Numbers overview page did not show on the sidebar in the Settings area, only on the Settings overview page. This is now fixed!
It's "Rooms" now, not Bedrooms. Recently, the "bedroom and bathrooms" parts of property content expanded to be "Rooms" in their own menu area and with significantly more options. However, we noticed that the Properties > General Info > Change page still lists the Sleeps overrides as being in Amenities instead of in Rooms since the update, so we fixed it.
Remove spaces from the TO email header. Previously, if an email address contained an email address, it was silently dropped by our email sending systems in the background. The user wasn't notified, the email message just wouldn't go out. But wait, you ask--! How can an email address have a space in it when OwnerRez doesn't allow that? Ah, good question! In very rare situations, an email address was being formed by field codes that would have spaces or other characters in it that were not being removed. We added a process after field code rendering that checks for spaces and removes them. This might lead to the email message failing to be delivered, but at least you'll see the failure now instead of it being silently dropped.


