A website is a great way of establishing your own brand and building a strong repeat-guest list as you grow from small owner to PM and beyond. Our Hosted Website feature is built directly into OwnerRez is easy to use and works with the property, listing, rate and rule data you've already entered in your account.
Once you've got your website ready to go, you'll want to make sure it's running on your own custom domain name.
Once you've got your website ready to go, you'll want to make sure it's running with your own custom domain name. When you're ready to go live with your website, you'll link up your own domain name (DNS) to the OwnerRez servers and from then on the hosted website will "live" at your domain and typing in that domain will take you directly to your OwnerRez hosted website. This video will walk you through the steps of setting DNS with Google Domains.
Check out our Setup Checklist to learn more.
Steps to setup DNS records for Google Domains:
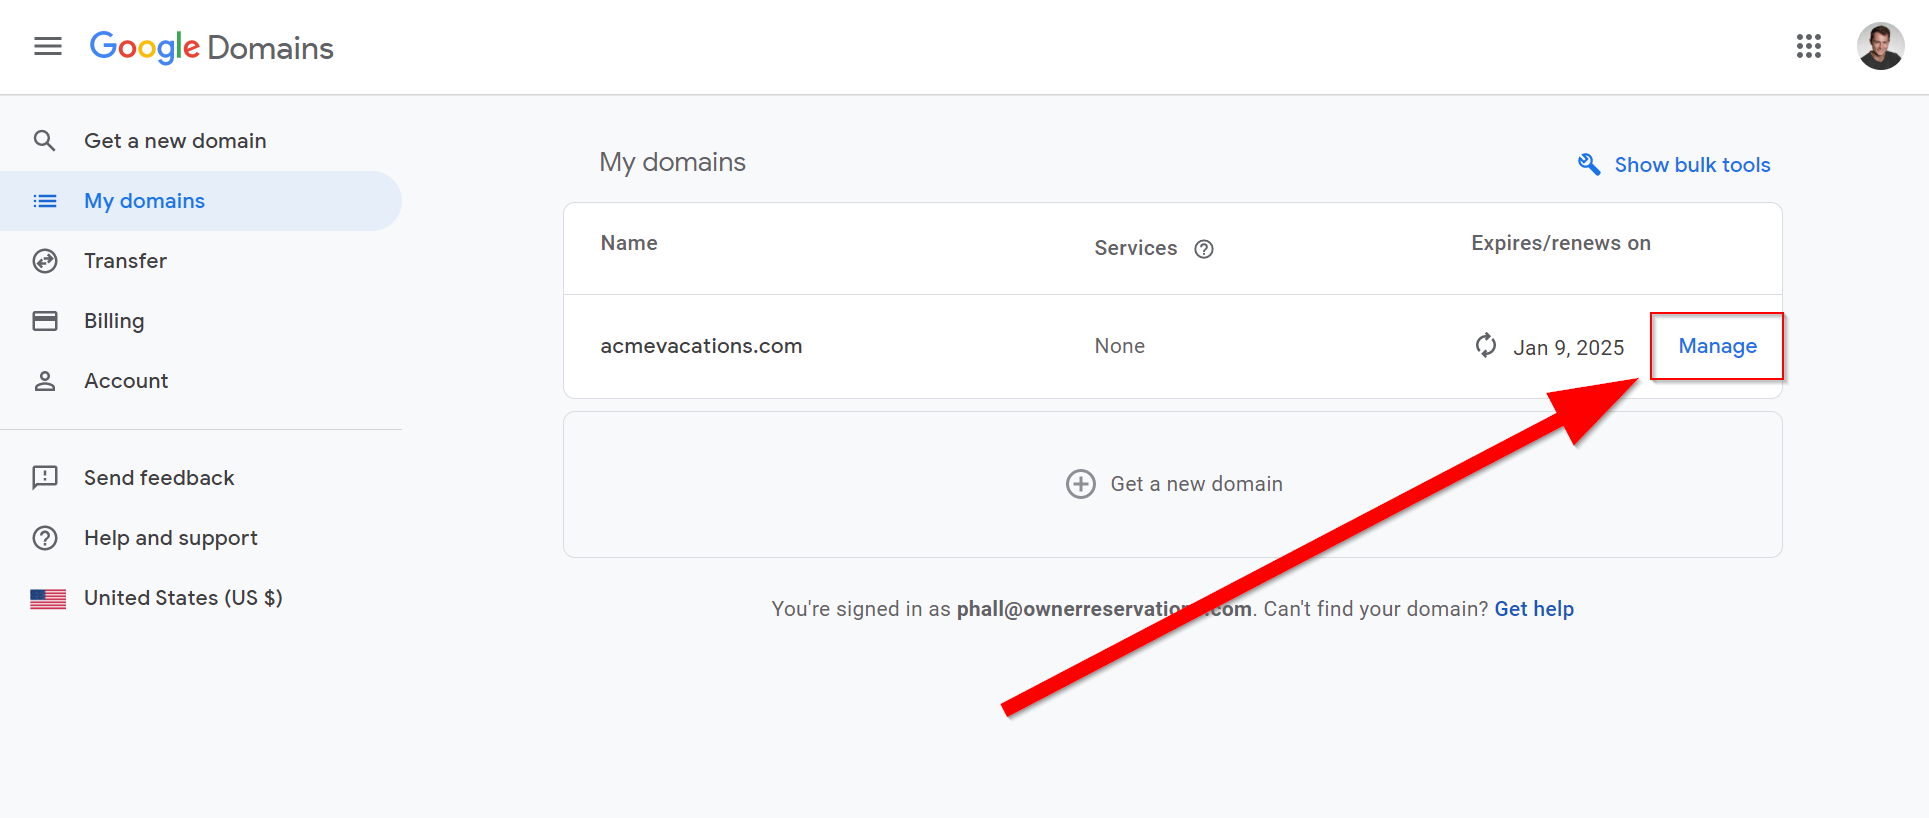
1. Login to Google Domains, then click Manage next to the domain you would like to point towards OwnerRez.
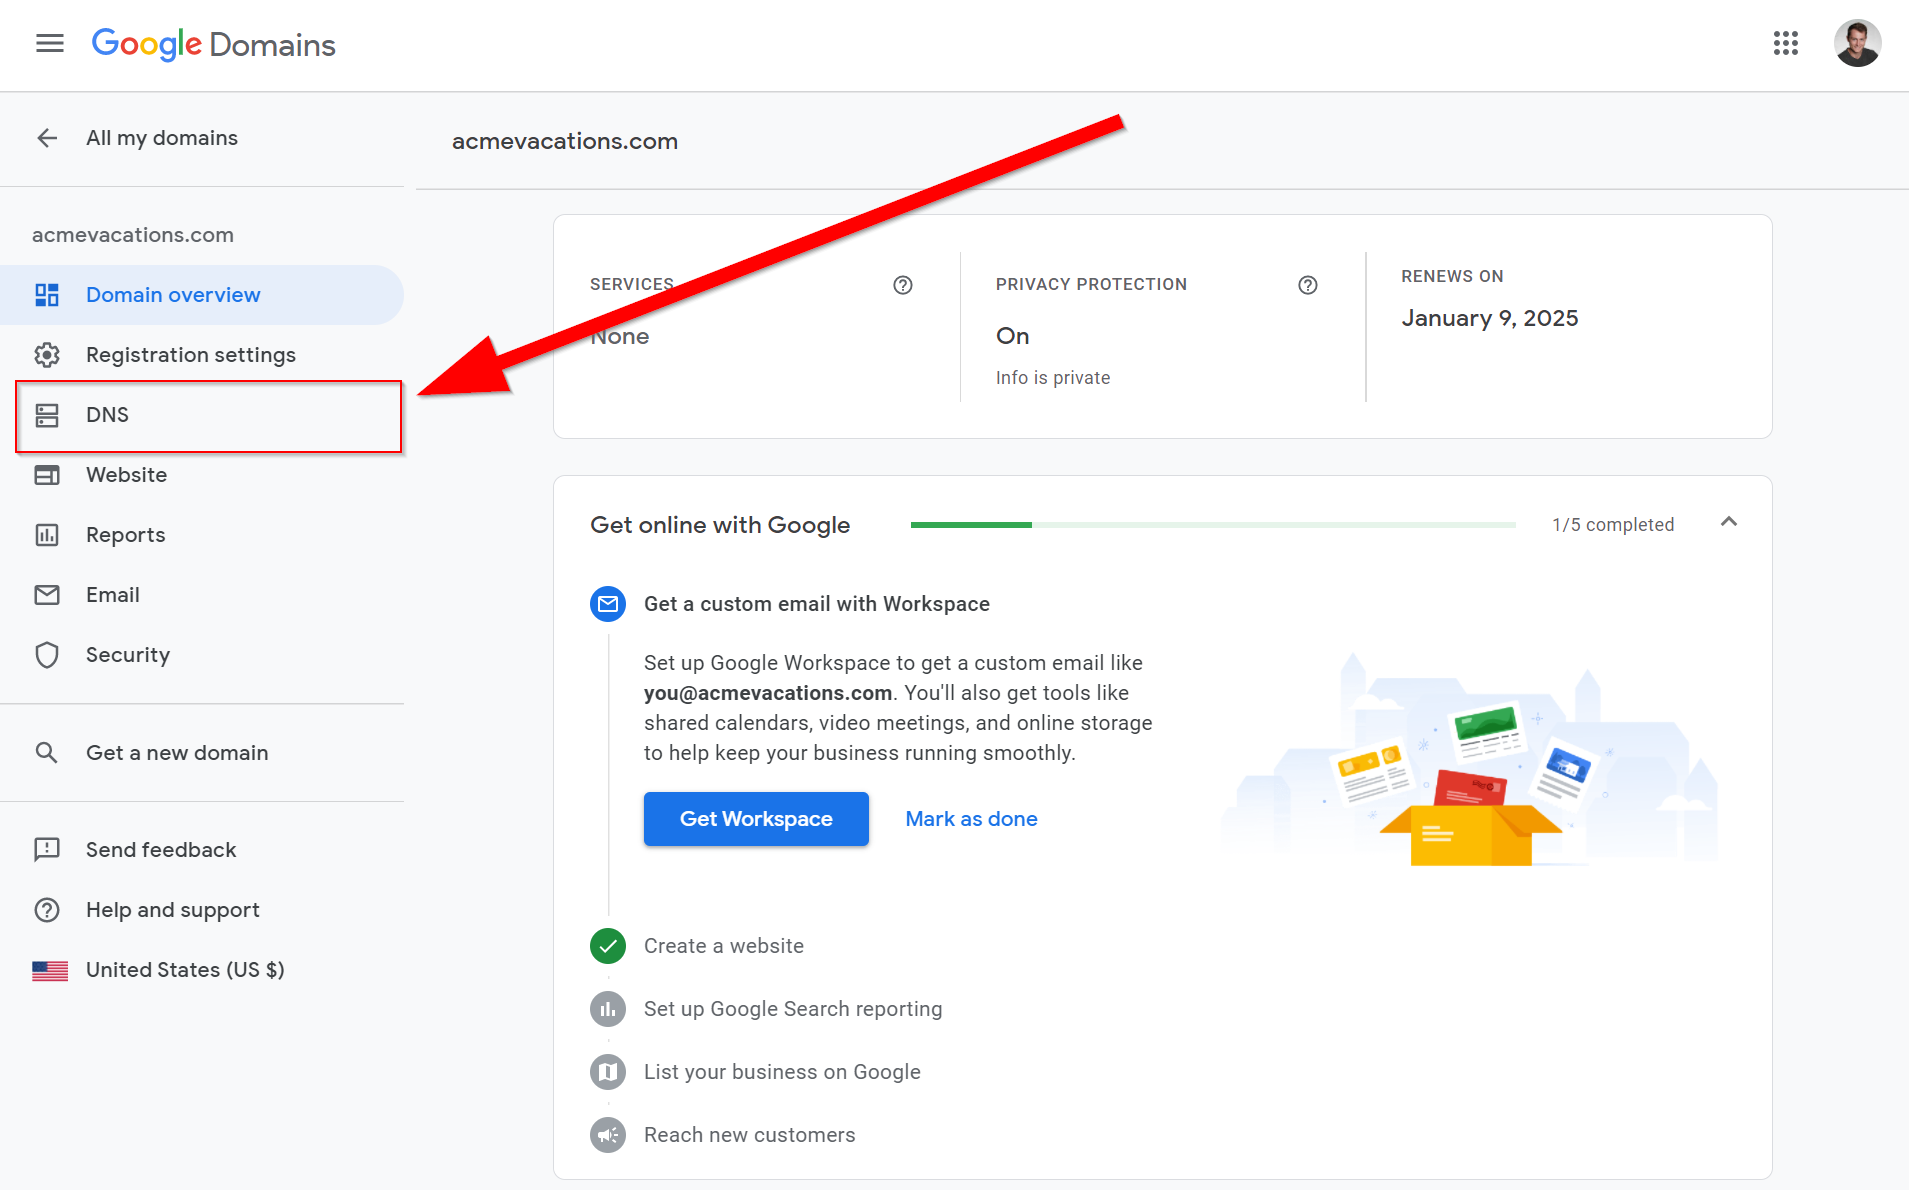
2. Next select DNS from the left sidebar.
3. Now scroll down to the bottom of the page to custom resource records.
- Remove any A type records with a host name of "@".
- Add 3 new A type records with the host name "@", one for each IP address below:
- 52.201.23.5
- 52.86.46.114
- 34.235.235.52
- Create (or set if there is one already) a CNAME type record with a host name of "www" pointing to hosted.ownerrez.com
- If there are any AAAA type records with a host name of "@", delete them. This is rare.
Test:
You can ensure that you have set your DNS settings correctly by going to Settings > Hosted Websites, then click Check DNS.
Wait at least an hour after making changes before testing - it can take some time for DNS changes to propagate across the Internet.
If you have set your DNS setting correctly, you will see this. If you do not see this, then you should double check what you set in your domain registrar.


